Natural light indisputably is the most beautiful part of any type of photography; the way the light illuminates a room, pouring its brightness over surfaces, casting a natural shadow that conveys a sense of depth is a mesmerizing experience in itself. But shooting photos using natural light can also be one of the most unpredictable parts of photography. Working with the ever-changing sun and random weather are just a few challenges of using and shooting with natural light. Most of these challenges can be taken care of in the post-production phase with the help of Styldod's expert image editing services
That said, you can overcome the variability and challenge of natural light photography by understanding the sun and setting up your camera to make optimal use of natural light. This small guide will teach you how to take your best photos using natural light.
Tips to Shoot Real Estate Photos Using Natural Light
1. Using sunlight on the exterior
A bright sunny day is perfect for exterior shots. The position of the sun changes from hour to hour. So, try to plan your shoot when the sun is shining on the front of the house, usually around late mornings or early afternoons.
Sometimes, on the day of the planned shoot, the weather may try to do what it does best – be unpredictable. You may not be able to capture the perfect shot because it was raining or the day was cloudy. Don't panic. You can always use Day to Dusk editing services to make it look perfect.
2. Selecting the right camera angle and position in the room
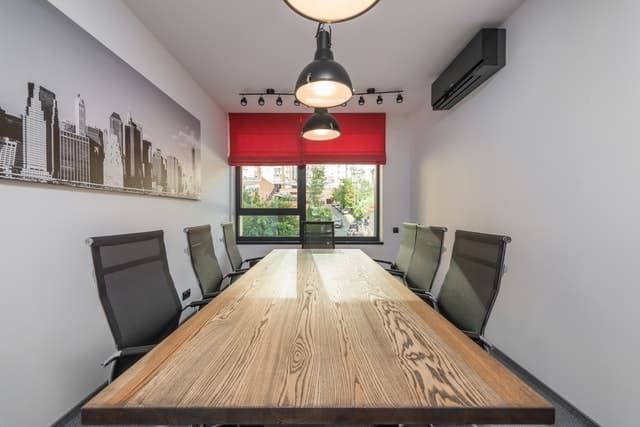
Usually, there is one spot in the room, which can be termed as an ideal spot that show cases the best angle of the room. The room's best angle is the one that shows as much of the room as possible and presents the furniture and the architectural elements in the most aesthetically pleasing way. So, how to spot the ideal spot? Finding the spot depends on 2 things: window brightness and available space. The space should be enough for you to physically occupy it and position your camera to capture the three walls in your shot to give the viewer a better idea of the room's size and space.
In small rooms, the ideal spot is usually the doorway. Larger rooms offer more than one ideal spot. Pick up a spot where the bright windows are at 45 degrees away from the center of your lens' field of view. This will help you avoid shooting in high-contrast situations and the potential lens flare.
3. Choosing the best hour of the day
The best time for shooting during the day is around midday, but some properties get the most light in the early morning or late afternoon. Schedule your shoot in such a way that you have enough time to shoot in the presence of constant natural light.
For an interior shoot, it's best to avoid shooting at sunset because the light changes color quickly.
4. Using mixed lighting inside
One of the challenges of using natural light in your real estate photography is to deal with mixed lighting situations. To overcome this challenge, you can decide to switch off the interior lights and work with single daylight color for consistent color temperature throughout your real estate image. But, if the daylight is too weak, you might not get the perfect shot. This problem can be sorted in post-production. Styldod can enhance your image and make it look perfect.
5. Use HDR while maintaining a natural look
When we enter a room, our eyes try to adapt to the environment to sense the room's shadows and highlights. But it's a task to capture that wide an angle in a single shot. Even the most advanced camera sensor fail to do it.
Try to capture every image with bracketing; the more the brackets, the wider your range of choices are in the post-production stage. Capture different exposures and then combine them in post-production.
Some additional tips on how to shoot using natural light in HDR mode
· Use a wide-angle lens along with a camera and tripod.
· Avoid shooting directly into extremely bright windows.
· Adjust blinds and shades to control the contrast in a room.
· When faced with mixed lighting situations, shoot as many different variations as possible to give yourself plenty of options when you are in the image post-production stage.
Get more tips and insight in this guide to real estate photography.
If you are notable to capture the perfect shot, you can get your imperfect real estate image edited to make it look perfect. Call Styldod for help.